Sharing Content in Webex
To show exhibits such as documents, photos or video recordings during your remote hearing, you will use the Webex Share option. This allows the other hearing participants to see all or part of your computer screen.
Protect your privacy
Do not share your entire screen during the hearing. Instead, we encourage you to share just the window or application you want others to see.When you share your entire screen, everyone can see everything on your desktop, including open web pages, documents, chat messages and email notifications. These can be distracting or worse: they could cause embarrassment, or show sensitive information.
Play it safe. Close all windows and applications except those you need for the hearing.
Some remote hearing participants may be joining by phone, and may not be able to see things shared in Webex. Remember that you must send copies of your exhibits to the court and the other party, making sure they are received several days before the hearing. Check your hearing notice for the required number of days.
These instructions are for sharing your applications, not your files.
- An application is a tool like Adobe Acrobat, Excel, Media Player, or Word.
- A file is an individual document within one of those applications.
If you have more than one document in an application open, you will be allowing participant to see all of the documents in that application.
- Before the hearing starts, open the file that you plan to share. Note which application runs the file. Does it use Adobe, Excel, Media Player, or Word, or some other program? You may need to minimize the application window until you are ready to share so you can see the Webex meeting screen.
- When you are ready to share, ask the court for permission to share.
- Once the judge grants permission, the Webex host will pass you the presenter icon.
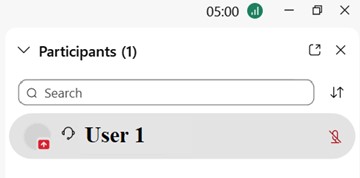
- You will see the icon next to your name in the Participants tab.
- You will see a brief pop-up that says “You are now the presenter.”
- The Share button at the bottom of your Webex screen will now be active. It was previously grayed out; now it’s fully visible.

- Click the Share button. If you are sharing an audio or video file, skip to Sharing Audio or Video section.
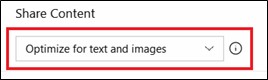
Look in the upper left corner of the Share Content menu for your optimization options. Select Optimize for text and images.
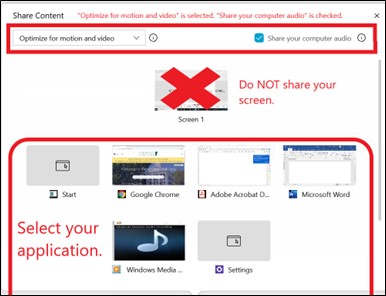
You will see all the open applications on your computer in the Share Content menu.
Select the application you would like to share and click Share.
Do not share your entire screen. Instead, just share the specific application.
Now that you are sharing the application, maximize the application to provide the best view for all participants.
What you see on your screen is what others are seeing. If you do not see the application, make sure it is not minimized.
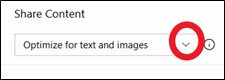
Look in the upper left corner of the Share Content menu for your optimization options. Click the drop-down arrow.
Select Optimize for motion and video. Make sure the blue box next to Share your computer audio is checked.

You will see all the open applications on your computer in the Share Content menu.
Select the application you would like to share and click Share.
Do not share your entire screen. Instead, just share the specific application.
Now that you are sharing the application, maximize the application to provide the best view for all participants.
What you see on your screen is what others are seeing. If you do not see the application, make sure it is not minimized.
When you are ready to stop sharing, move your cursor all the way to the top and middle of your computer screen. The Webex toolbar will appear when you hover over the correct part of the screen.
You will see an orange rectangle below the toolbar with the message “You’re sharing [name of application].”
Click the Stop Sharing button.

If this doesn’t work, close the application you were sharing.
Another option is to ask the Webex host to take you out of presenter mode.
When you are sharing an application in Webex, the Webex layout changes.
Videos
When you are sharing an application, the participants’ videos will be in a pop-out box.
- To minimize the video screen, hover over the box and click the drop-down arrow that will appear. Here, the arrow is circled in red.
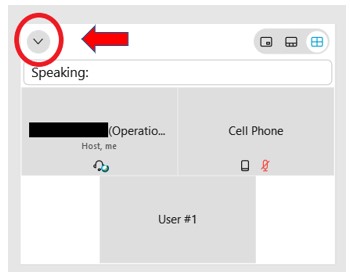
- To expand the videos again, click the arrow circled in red.

Participants & Chat features
- Move your cursor all the way to the top and middle of your computer screen. The Webex toolbar will appear when you hover over the correct part of the screen.
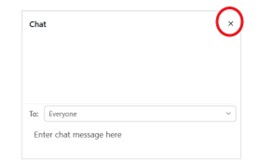
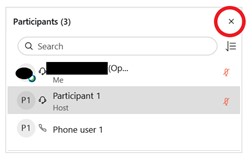
- Click on the Participants or Chat icon. They will then appear as pop-out windows.

- Click on the “X” (circled in red below) in the pop-out windows to make them disappear.
Zoom in or out on something someone else is sharing
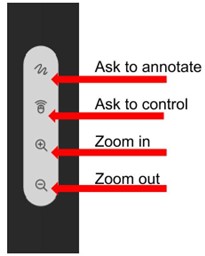
- While someone is sharing, look to the left side of your Webex screen for a toolbar.
- Click the “Zoom in” and “Zoom out” buttons to change your view.
The Webex Annotate option allows you to add arrows, boxes and text, and highlight, and circle items.
- While you are sharing an application, move your cursor all the way to the top and middle of your computer screen. The Webex toolbar will appear when you hover over the correct part of the screen.
- Click Annotate.

- The annotation toolbar will appear on the left-hand side of your screen.
- Your mouse is now in the annotation mode. To use your cursor again, click the cursor button at the bottom of the annotation toolbar (in the red square).
- When you are done annotating, click the “X” at the top of the annotation toolbar (circled in red).
- Your annotations will not be saved. When you close the annotation toolbar, the annotations disappear.
